

Ramanas Park | Pokemon |
| South Exit: Route 221 |
 |
| Area Anchors | |||||||||
| Main Area | Kanto Room | Johto Room | Squall Room | Rainbow Room | |||||
|  |  |  |  | |||||
| Discovery Room | Soul Room | Oceanic Room | Tectonic Room | Stratospheric Room | |||||
 |  |  |  |  | |||||
| Genome Room | Distortion Room | ||||||||
 |  | ||||||||
| Anchors |
Shops
| Shard Exchange | ||
| Picture | Item | Price |
 | Discovery Slate | 3 Mysterious Shard S 1 Mysterious Shard L |
 | Johto Slate | 3 Mysterious Shard S 1 Mysterious Shard L Brilliant Diamond Only |
 | Kanto Slate | 3 Mysterious Shard S 1 Mysterious Shard L Shining Pearl Only |
 | Soul Slate | 3 Mysterious Shard S 1 Mysterious Shard L |
 | Distortion Slate | 3 Mysterious Shard S 1 Mysterious Shard L |
 | Rainbow Slate | 3 Mysterious Shard S 1 Mysterious Shard L Brilliant Diamond Only |
 | Squall Slate | 3 Mysterious Shard S 1 Mysterious Shard L Shining Pearl Only |
 | Oceanic Slate | 3 Mysterious Shard S 1 Mysterious Shard L |
 | Tectonic Slate | 3 Mysterious Shard S 1 Mysterious Shard L |
 | Stratospheric Slate | 3 Mysterious Shard S 1 Mysterious Shard L |
 | Genome Slate | 3 Mysterious Shard S 1 Mysterious Shard L |
Wild Pokémon
| Anchors | Interaction | |
Interactable | |||||||||||||||||||||||||||||||
| Pokémon Brilliant Diamond | |||||||||||||||||||||||||||||||
| Pokémon Shining Pearl | |||||||||||||||||||||||||||||||
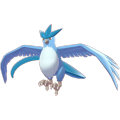 | 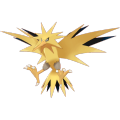 |  | |||||||||||||||||||||||||||||
| Articuno | Zapdos | Moltres | |||||||||||||||||||||||||||||
  |  |  | |||||||||||||||||||||||||||||
| % | % | % | |||||||||||||||||||||||||||||
| Level | Level | Level | |||||||||||||||||||||||||||||
| 70 - 70 | 70 - 70 | 70 - 70 | |||||||||||||||||||||||||||||
Wild Pokémon
| Anchors | Interaction | |
Interactable | |||||||||||||||||||||||||||||||
| Pokémon Brilliant Diamond | |||||||||||||||||||||||||||||||
 | 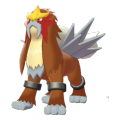 | 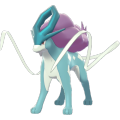 | |||||||||||||||||||||||||||||
| Raikou | Entei | Suicune | |||||||||||||||||||||||||||||
| |  | |||||||||||||||||||||||||||||
| % | % | % | |||||||||||||||||||||||||||||
| Level | Level | Level | |||||||||||||||||||||||||||||
| 70 - 70 | 70 - 70 | 70 - 70 | |||||||||||||||||||||||||||||
| Pokémon Shining Pearl | |||||||||||||||||||||||||||||||
Wild Pokémon
| Anchors | Interaction | |
Interactable | |||||||||||||||||||||||||||||||
| Pokémon Brilliant Diamond | |||||||||||||||||||||||||||||||
| Pokémon Shining Pearl | |||||||||||||||||||||||||||||||
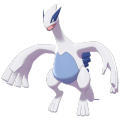 | |||||||||||||||||||||||||||||||
| Lugia | |||||||||||||||||||||||||||||||
 | |||||||||||||||||||||||||||||||
| % | |||||||||||||||||||||||||||||||
| Level | |||||||||||||||||||||||||||||||
| 70 - 70 | |||||||||||||||||||||||||||||||
Wild Pokémon
| Anchors | Interaction | |
Interactable | |||||||||||||||||||||||||||||||
| Pokémon Brilliant Diamond | |||||||||||||||||||||||||||||||
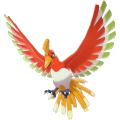 | |||||||||||||||||||||||||||||||
| Ho-Oh | |||||||||||||||||||||||||||||||
| | |||||||||||||||||||||||||||||||
| % | |||||||||||||||||||||||||||||||
| Level | |||||||||||||||||||||||||||||||
| 70 - 70 | |||||||||||||||||||||||||||||||
| Pokémon Shining Pearl | |||||||||||||||||||||||||||||||
Wild Pokémon
| Anchors | Interaction | |
Interactable | |||||||||||||||||||||||||||||||
| Pokémon Brilliant Diamond | |||||||||||||||||||||||||||||||
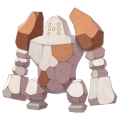 |  | 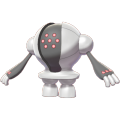 | |||||||||||||||||||||||||||||
| Regirock | Regice | Registeel | |||||||||||||||||||||||||||||
 | |  | |||||||||||||||||||||||||||||
| % | % | % | |||||||||||||||||||||||||||||
| Level | Level | Level | |||||||||||||||||||||||||||||
| 70 - 70 | 70 - 70 | 70 - 70 | |||||||||||||||||||||||||||||
| Pokémon Shining Pearl | |||||||||||||||||||||||||||||||
| | | |||||||||||||||||||||||||||||
| Regirock | Regice | Registeel | |||||||||||||||||||||||||||||
| | | |||||||||||||||||||||||||||||
| % | % | % | |||||||||||||||||||||||||||||
| Level | Level | Level | |||||||||||||||||||||||||||||
| 70 - 70 | 70 - 70 | 70 - 70 | |||||||||||||||||||||||||||||
Wild Pokémon
| Anchors | Interaction | |
Interactable | |||||||||||||||||||||||||||||||
| Pokémon Brilliant Diamond | |||||||||||||||||||||||||||||||
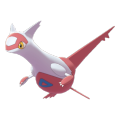 | 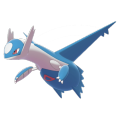 | ||||||||||||||||||||||||||||||
| Latias | Latios | ||||||||||||||||||||||||||||||
 | | ||||||||||||||||||||||||||||||
| % | % | ||||||||||||||||||||||||||||||
| Level | Level | ||||||||||||||||||||||||||||||
| 70 - 70 | 70 - 70 | ||||||||||||||||||||||||||||||
| Pokémon Shining Pearl | |||||||||||||||||||||||||||||||
| | ||||||||||||||||||||||||||||||
| Latias | Latios | ||||||||||||||||||||||||||||||
| | | ||||||||||||||||||||||||||||||
| % | % | ||||||||||||||||||||||||||||||
| Level | Level | ||||||||||||||||||||||||||||||
| 70 - 70 | 70 - 70 | ||||||||||||||||||||||||||||||
| Picture | Item | Method | Quantity |
 |
Apicot Berry | Catch Latios | |
 |
Petaya Berry | Catch Latias | |
 |
Soul Dew | Catch both Latios & Latias |
Wild Pokémon
| Anchors | Interaction | |
Interactable | |||||||||||||||||||||||||||||||
| Pokémon Brilliant Diamond | |||||||||||||||||||||||||||||||
 | |||||||||||||||||||||||||||||||
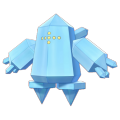
| Kyogre | |||||||||||||||||||||||||||||||
| |||||||||||||||||||||||||||||||
| % | |||||||||||||||||||||||||||||||
| Level | |||||||||||||||||||||||||||||||
| 70 - 70 | |||||||||||||||||||||||||||||||
| Pokémon Shining Pearl | |||||||||||||||||||||||||||||||
| |||||||||||||||||||||||||||||||
| Kyogre | |||||||||||||||||||||||||||||||
| |||||||||||||||||||||||||||||||
| % | |||||||||||||||||||||||||||||||
| Level | |||||||||||||||||||||||||||||||
| 70 - 70 | |||||||||||||||||||||||||||||||
| Picture | Item | Method | Quantity |
 |
Enigma Berry | Catch Kyogre | |
 |
Micle Berry | Catch Kyogre | |
 |
Custap Berry | Catch Kyogre |
Wild Pokémon
| Anchors | Interaction | |
Interactable | |||||||||||||||||||||||||||||||
| Pokémon Brilliant Diamond | |||||||||||||||||||||||||||||||
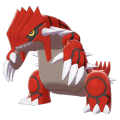 | |||||||||||||||||||||||||||||||
| Groudon | |||||||||||||||||||||||||||||||
 | |||||||||||||||||||||||||||||||
| % | |||||||||||||||||||||||||||||||
| Level | |||||||||||||||||||||||||||||||
| 70 - 70 | |||||||||||||||||||||||||||||||
| Pokémon Shining Pearl | |||||||||||||||||||||||||||||||
| |||||||||||||||||||||||||||||||
| Groudon | |||||||||||||||||||||||||||||||
| |||||||||||||||||||||||||||||||
| % | |||||||||||||||||||||||||||||||
| Level | |||||||||||||||||||||||||||||||
| 70 - 70 | |||||||||||||||||||||||||||||||
| Picture | Item | Method | Quantity |
 |
Liechi Berry | Catch Groudon | |
 |
Salac Berry | Catch Groudon | |
 |
Ganlon Berry | Catch Groudon |
Wild Pokémon
| Anchors | Interaction | |
Interactable | |||||||||||||||||||||||||||||||
| Pokémon Brilliant Diamond | |||||||||||||||||||||||||||||||
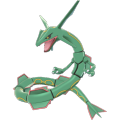 | |||||||||||||||||||||||||||||||
| Rayquaza | |||||||||||||||||||||||||||||||
| | |||||||||||||||||||||||||||||||
| % | |||||||||||||||||||||||||||||||
| Level | |||||||||||||||||||||||||||||||
| 70 - 70 | |||||||||||||||||||||||||||||||
| Pokémon Shining Pearl | |||||||||||||||||||||||||||||||
| |||||||||||||||||||||||||||||||
| Rayquaza | |||||||||||||||||||||||||||||||
| | |||||||||||||||||||||||||||||||
| % | |||||||||||||||||||||||||||||||
| Level | |||||||||||||||||||||||||||||||
| 70 - 70 | |||||||||||||||||||||||||||||||
| Picture | Item | Method | Quantity |
 |
Rowap Berry | Catch Rayquaza | |
 |
Jaboca Berry | Catch Rayquaza | |
 |
Roseli Berry | Catch Rayquaza |
Wild Pokémon
| Anchors | Interaction | |
Interactable | |||||||||||||||||||||||||||||||
| Pokémon Brilliant Diamond | |||||||||||||||||||||||||||||||
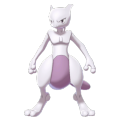 | |||||||||||||||||||||||||||||||
| Mewtwo | |||||||||||||||||||||||||||||||
| |||||||||||||||||||||||||||||||
| % | |||||||||||||||||||||||||||||||
| Level | |||||||||||||||||||||||||||||||
| 70 - 70 | |||||||||||||||||||||||||||||||
| Pokémon Shining Pearl | |||||||||||||||||||||||||||||||
| |||||||||||||||||||||||||||||||
| Mewtwo | |||||||||||||||||||||||||||||||
| |||||||||||||||||||||||||||||||
| % | |||||||||||||||||||||||||||||||
| Level | |||||||||||||||||||||||||||||||
| 70 - 70 | |||||||||||||||||||||||||||||||
| Anchors |
| Picture | Item | Method | Quantity |
 |
Griseous Orb | Defeat the shadow Giratina |