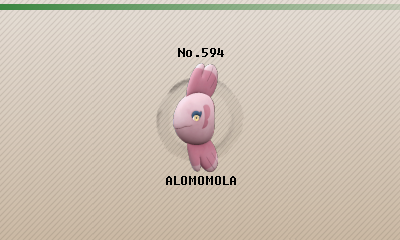
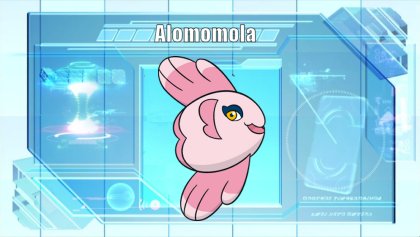
Alomomola, the Caring Pokémon. It gently holds injured and weak Pokémon in its fins. Its special membrane heals their wounds. They float upon the open sea. Many water Pokémon gather in the area around Alomomola.
Overview
After taking the 8th generation off, our ersatz Luvdisc returns with aplomb in the ninth generation as a sturdy wall and cleric. 80 Defense may not seem impressive but coupled with a whale-like base 165 HP and guaranteed recovery in Regenerator, Alomomola can take physical hits like nobody’s business. Pure Water typing greatly aids in this task, having few exploitable weaknesses and offering access to rare utility moves like Scald and Flip Turn. Alomomola’s true claim to fame is Wish. With its absurd base HP, Alomomola’s Wishes are effectively full heals, and with Regenerator both Alomomola and its partner are healing at the same time. All these sources of healing make Alomomola laborious to take down in repeated blows, able to time and time again come back for another round of healing, something fellow bulky Water type Dondozo struggles to match.
While Alomomola’s hit taking ability is certainly incredible, it is not the hard wall to many physical attackers the same way fellow bulky Water Dondozo is, lacking the sheer defense and Unaware of its contemporary that stifles even boosting sweepers. Boosting sweepers Alomomola struggles against due to its passivity, with even Super Effective Scalds merely 3HKOing at best, while its better and still below average Attack lacks utility moves like Scald and Chilling Water. Even with the latter two moves, Alomomola has little to disrupt an opponent, mostly geared towards opposing physical attackers. Poor base 45 Special Defense is even more exploitable than Dondozo’s own, and the popularity of the latter ensures teams will often have answers to both. While 65 Speed isn’t bottom of the barrel, it often hurts more than it helps, forcing Alomomola to take a hit before acting, and limiting the targets it can freely switch in on. While possessing many crippling flaws, Alomomola’s resilience wins out in the end, being the centerpiece of many teams’ defensive efforts that must be taken down to get damage to stick.
Positives
Base 165 HP is ridiculous, turning even Alomomola’s average 80 Defense into incredible hit taking ability.
Regenerator is an absurd ability, offering endless healing and generating advantage just by switching out.
Access to Scald and Wish enables Alomomola’s playstyle, shutting down physical attackers while keeping Alomomola and its team
Negatives
Poor base 45 Special Defense is quite exploitable. Alomomola can never take as many special hits as it can physical.
65 Speed is an anchor when not talking about Flip Turn, weakening Alomomla’s bulk and forcing it to pick its switches carefully.
Poor offenses and loss of Toxic have made Alomomola incredibly passive, with only Scald burns preventing it from becoming complete setup fodder.
Movesets
Return to Fish
-Wish
-Flip Turn
-Scald
-Protect
Ability: Regenerators
Item: Leftovers
EVs and Nature:
252 HP / 4 Def / 252 SDef
Relaxed Nature
Alomomola’s healing set is vital to the functioning of stall and bulky offensive teams, giving the bulkiest Pokémon whose only flaw is a lack of reliable recovery, actual recovery, giving them a measure of the longevity Alomomola boasts. Wish is vital to Alomomola’s clerical abilities offering massive healing not only to itself, but its teammates and with Alomomola’s massive HP, it is easily capable of fully healing all but the bulkiest Pokémon. Flip Turn is just as vital to Wish and synergizes perfectly with Alomomola as a whole. With Flip Turn, Alomomola can weaponize its slow speed to pivot in an ally after the opponent acts, giving them a free switch in and massive heal from Wish while Alomomola shrugs off any damage incurred in the interim thanks to Regenerator. Even without Wish, Flip Turn is still invaluable for double switching, helping Alomomola’s team gain an advantage in positioning while chipping down the opposing Pokémon. Scald, while weak thanks to Alomomola’s pitiful Special Attack, is here for its meaty burn chance utterly ruining physical attackers and is a strong dissuasion tool against those thinking to stay in and try to boost up. Protect rounds out the set, synergizing well with Wish to give Alomomola pseudo-Recover, while scouting out for lures like a Terastalization or surprise coverage move.
Tera Types:
Alomomola tends to coast by on purely on its stats and its base typing is rather strong to begin with. Add in Regenerator allowing Alomomola to heal itself while switching, and in summary it rarely needs to Terastalize, if at all. If Alomomola does need to Terastalize, it is often to dodge a super effective blow and Flip Turn safely. Tera Fairy is popular and for good reason, being an excellent defensive type with hard to exploit weaknesses and prominent resistances to popular physical types in Dark, Fighting and Dragon, the latter vital in blocking Draco Meteors that can wipe out Alomomola. Tera Ghost is a great alternative for completely no selling popular Fighting attacks on top of blanking Rapid Spins. Tera Steel is the ever-classic defensive Tera standby, the sheer number of resistances it provides always merits consideration. Tera Flying should not be discounted either, between turning Alomomola’s Grass weakness into a resistance, the added resistances and immunities to Fighting and Ground and immunity to non-Stealth Rock entry hazards can more than make up the difference.
EVs and Items:
Max HP and Special Defense, are recommended for Alomomola for general walling capability. Max HP investment is highly recommended whenever running Wish, to get the most healing out of it for Alomomola’s teammates. The Special Defense investment is recommended to cover for Alomomola’s achilles heel, with Alomomola’s massive HP ensuring that investment goes a long way, generally causing Special Attacks to need an extra hit to down Alomomola, like pushing Gholdengo’s Shadow Ball from a probable 2HKO into a guaranteed 3HKO, push Iron Crown’s Future sight to barely half of Alomomola’s HP, prevent Raging Bolt from OHKOing with Electric STAB, and with a neutral Terastalizatiion, even push the damage down to the point where it can be fully recovered by Regenerator. Full Defense investment shouldn’t be discounted either, if one wants to go all in on Alomomla’s physical hit tanking ability, easily soaking powerful attacks like Excadrill’s, Landorus-Therian’s, and Garchomp’s Earthquakes, Great Tusk’s Headlong Rushes, Roaring Moon’s Knock Offs, and Zamazenta’s Close Combats, able to take 3 to 4 hits from such Pokémon with ease. Relaxed nature is recommended regardless to bolster Alomomola’s physical Defense, and the speed reducing nature synergizing nicely with Flip Turn. Leftovers is recommended for the sheer longevity that it provides Alomomola. However, Heavy Duty Boots is good given the number of times Alomomola will switch out, preventing hazards from cutting into Regenerator recovery and protecting Alomomla from Toxic Spikes, an otherwise excellent answer into Alomomola. Binding Band is good if running Whirlpool, adding significant chip damage to what is otherwise a passive Pokémon.
Partners:
:
Given Alomomola’s poor Special Defense, sponges that can cover for Alomomola’s poor Special Defense are invaluable. Blissey is the go-to option on stall teams, its legendary special bulk complimenting Alomomola’s physical bulk nicely and access to Heal Bell can address Alomomola’s vulnerability to Toxic, though that is difficult to fit in. Together the two make for a decent defensive core through sheer bulk alone and Alomomola’s Wishes are invaluable in preserving Softboiled PP. Clodsire is another sponge of note, its Electric immunity making it a great emergency pivot for Alomomola, while its Unaware prevents setup sweepers from taking advantage of Alomomola’s passivity.
Bulky Pokémon that have no way to recover incurred damage love Alomomola for its ability to address that crippling flaw of theirs, allowing them to hit the field time and time again. Notable examples include bulky Ground types like Great Tusk and Ting-Lu, whose Electric Immunity is a pivot for Alomomola, while their hazards allow Alomomola to provide pressure through the switches it forces. Raging Bolt is also incredible, being an offensive beneficiary to Alomomola’s Wishes, while comfortably absorbing both Electric and Grass attacks looking to break through Alomomola.
Other Options:
Mirror Coat is a surprising option for Alomomola to wield. Its special hit taking ability, while poor, isn’t so horrendous that it is easily knocked out in a single hit, allowing for a surprise KO on what is otherwise such a passive Pokémon.
Whirlpool is a trapping option that deals significant chip damage, giving Alomomola the freedom to switch or Flip Turn without fear of a counter switch or being forced to take unnecessary damage, while softening up the target for Alomomola’s partner.
Piscine Tempest Wall
-Mirror Coat
-Flip Turn
-Aqua Jet
-Play Rough
Ability: Regenerators
Item: Assault Vest
EVs and Nature:
4 HP / 252 Def / 252 SDef
Sassy Nature
Assault Vest Alomomola turns expectations on their head, heavily punishing physical sweepers expecting conventional Wish sets. Mirror Coat is the star of this set, with Alomomola’s massive HP and heavily invested Special Defense, it can take powerful special blows quite well and respond with a lethal surprise. Flip Turn remains as a great slow pivot option, allowing Alomomola to come in repeatedly and get an ally in safely while chipping the opponent down and recovering damage taken in the interim with Regenerator. Aqua Jet, while not strong in Alomomla’s hands, is priceless at picking off weakened foes like Sturdy Archaludon, and Pokémon hanging on with a Focus Sash like Chien-Pao, Flutter Mane, Urshifu, etc. Play Rough rounds out the set, offering Alomomola extra coverage outside of Water STAB, synergizing nicely with Mirror Coat by hitting the Dark types immune to it.
Tera Types:
Alomomola performs perfectly well with its admittedly great base typing and sheer bulk, making it unreliant on Terastalization, opening it up for more Tera reliant teammates. If one must Terastalize, Tera Fairy is strongly recommended. Not only is it a great defensive typing with hard to exploit resistances, but adds a little extra power to Play Rough, allowing Alomomola to threaten frailer Fairy weak Pokémon. If not running Play Rough, Poison is popular to stave off opposing Grass types like Ogerpon, and Rillaboom, as well as Fighting and Fairy types like Urshifu, and Mimikyu.
EVs and Items:
Max Defense and Special Defense investment are recommended to maximize Alomomola’s bulk, better to tank attacks thrown Alomomola’s way. While HP investment is usually recommended on defensive Pokémon due to HP investment impacting both defenses and thus being more efficient use of your limited EVs, with Alomomola’s base HP being so absurdly high in comparison to its defenses, one can forgo HP investment for more significant returns elsewhere, especially as this set cannot pass Wishes. Some HP investment wouldn’t be remiss, but Special Defense should always be max or near max in investment to get the most out of Assault Vest and to account for Alomomola’s own horrid base Special Defense. Assault Vest is the namesake of the set and without it this set does not function near as well.
Partners:
:
Frail Pokémon that struggle to get into battle safely appreciate Alomomola’s slow pivot capabilities to get in safely. Ditto is noteworthy, better able to avoid targets in cannot transform into and outright punish opponents that try to take advantage of Alomomola’s inability to directly threaten them with Flip Turn further serving this task in breaking any Focus Sashes that could prevent Ditto from successfully beating its doppelganger. Other examples like Chien-Pao and Flutter Mane can also make use of Alomomola’s pivoting services.
Other Options:
Liquidation is Alomomola’s strongest attack and can be used against physically frail Pokémon, but is otherwise falls to the wayside for the utility that Flip Turn and Aqua Jet provide.
Scald deserves mention, as despite Alomomola’s horrid special attack, the burn chance is just too hard to pass up in completely shutting down physical attackers. Chilling Water is near guaranteed in sapping a target’s attack, but is not as immediately impactful or persistent
Icy Wind combines well with Alomomola’s role as a pivot, sapping a target’s speed and making it more manageable for Alomomola’s harder hitting partners.
Countering Alomomola
While Alomomola’s passivity often makes its offense negligible, its incredible defense and healing prowess make taking down Alomomola a priority to start making progress against the opposing team.
Wellspring Ogerpon is exceptional at fishing up Alomomola, able to disrupt Alomomola’s main Wish-Flip Turn combination by pivoting in with Water Absorb, switching in and forcing Alomomola to run, while Assault Vest sets are threatened to be one shot by Power Whip. Water Absorb Clodsire too is decent at this and places a timer on Alomomola through Toxic, though its slower speed and poor direct offense have it struggle to deal with Alomomola expediently.
Sheer power is the simplest and most direct way to address Alomomola, taking it out before it can undo too much progress. Assault Vest sets can be handled by offensively invested Ogerpon with Power Whip or Ivy Cudgel, as well as Banded Rillaboom’s Wood Hammer, though the resulting recoil is devastating in the case of the latter. Defense invested Alomomola are more exposed to special attackers, with Specs Dragapult, Kyurem and Walking Wake all capable of OHKOing with their STABs as well as Raging Bolt, Sandy Shocks, and Serperior with their own super effective STABs. However, none of these can directly OHKO the Assault Vest variant and are exposed to Mirror Coat as a result.
Entry Hazards are invaluable in wearing Alomomola down and offsetting the healing it is getting from Regenerator, pushing it into KO range from a much wider pool of targets such as Tera Normal Ursaluna’s Façade, Gholdengo’s Thunderbolt, Specs Iron Crown’s Volt Switch, Banded Dragonite’s Outrage, and Sinistcha’s Matcha Gotcha. Using setups sweepers that don’t mind Scald’s damage or the Burn, like Swords Dance Wellspring Ogerpon, and especially Calm Mind sweepers like Raging Bolt, Primarina, and Sinistcha, can all take advantage of Alomomola’s inability to threaten them for their own momentum.
Locations in Games
Red/Blue/Yellow:
Not in game
Gold/Silver/Crystal:
Not in game
Ruby/Sapphire/Emerald:
Not in game
FireRed/LeafGreen:
Not in game
Colosseum/XD:
Not in game
Diamond/Pearl/Platinum:
Not in game
HeartGold/SoulSilver:
Not in game
Black/White:
Route 4, 17, 18, Driftveil City, P2 Laboratory
Black 2/White 2:
Route 4, 17, 18, P2 Lab, Virbank City, Virbank Complex
X/Y:
Shalour City, Azure Bay
Omega Ruby/Alpha Sapphire:
Route 122, Route 124, Route 126, Route 127, Route 128, Route 129, Route 130, Route 131, Route 132, Route 133, Route 134
Sun/Moon:
Brooklet Hill
Ultra Sun/Ultra Moon:
Brooklet Hill
Let's Go, Pikachu!/Let's Go, Eevee!:
Not in game
Sword/Shield:
Not in game
Brilliant Diamond/Shining Pearl:
Not in game
Legends: Arceus:
Not in game
Scarlet/Violet:
North Paldean Sea, Canyon Biome, Coastal Biome, Torchlit Labyrinth
Tera Raid Battles: 4 Star Raid Battles

Anime Appearences


