

Area Zero | Trainers | Items |
|
, Zero Lab, Research Station No. 1, Research Station No. 2, Research Station No. 3
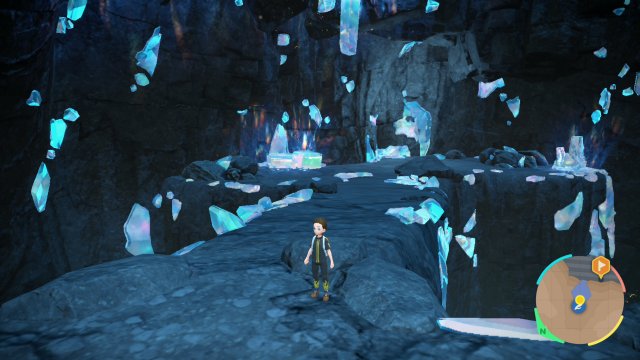
Area Zero is located in the Great Crater of Paldea and is off limits to students in the region. When you enter in, there are multiple research stations where Sada & Turo had set up stations for their research. Throughout the crater, various Paradox Pokémon can appear. There's a cave in the middle going down to the zero lab. Heath led an expedition there hundreds of years prior. |
 |
Interactive Map
At present, all Pokémon spawns listed are in the viscinity of the mark on our map, located within a radius of the spot, where our symbol should be in the centre of the radius. We hope to have more exact spawn data soon.
| Area Anchors | |||||||||
| Main Area | Underdepths | ||||||||
|  | ||||||||
Trainers
Scarlet / Violet
 |  |  |  |  |  |
|||||
| Pokémon Trainer Penny | Umbreon | Vaporeon | Jolteon | Flareon | Leafeon | Sylveon | ||||
| Battle Type Single Battle Items | Level 62 | Level 62 | Level 62 | Level 62 | Level 62 | Level 63 | ||||
 Synchronize |  Water Absorb |  Quick Feet |  Flash Fire |  Leaf Guard |  Cute Charm |
|||||
| Attacks: Dark Pulse Quick Attack Baby-Doll Eyes Psychic | Attacks: Hydro Pump Quick Attack Baby-Doll Eyes Aurora Beam | Attacks: Thunder Quick Attack Baby-Doll Eyes Pin Missile | Attacks: Flare Blitz Quick Attack Baby-Doll Eyes Fire Spin | Attacks: Leaf Blade Quick Attack Baby-Doll Eyes X-Scissor | Attacks: Moonblast Quick Attack Baby-Doll Eyes Shadow Ball |
|||||
| Hold Item: No Item | Hold Item: No Item | Hold Item: No Item | Hold Item: No Item | Hold Item: No Item | Hold Item: No Item | |||||
Tera Type Fairy | ||||||||||
| Multi-Battle Partner |
 |  |  |  |  |  |
|||||
| Pokémon Trainer Arven | Mabosstiff | Cloyster | Scovillain | Toedscruel | Garganacl | Greedent | ||||
| Battle Type Single Battle Items | Level 63 | Level 62 | Level 62 | Level 62 | Level 62 | Level 62 | ||||
Intimidate |  Skill Link | Chlorophyll |  Mycelium Might |  Purifying Salt |  Cheek Pouch |
|||||
| Attacks: Crunch Play Rough Psychic Fangs Fire Fang | Attacks: Rock Blast Icicle Spear Liquidation Light Screen | Attacks: Fire Blast Energy Ball Zen Headbutt Crunch | Attacks: Power Whip Earth Power Spore Sludge Bomb | Attacks: Stone Edge Earthquake Body Press Stealth Rock | Attacks: Bullet Seed Psychic Fangs Body Slam Earthquake |
|||||
| Hold Item: No Item | Hold Item: No Item | Hold Item: No Item | Hold Item: No Item | Hold Item: No Item | Hold Item: No Item | |||||
| Multi-Battle Partner |
 |  |  |  |  |  |
|||||
| Champion Nemona | Lycanroc | Goodra | Dudunsparce | Orthworm | Pawmot | Meowscarada | ||||
| Battle Type Single Battle Items | Level 65 | Level 65 | Level 65 | Level 65 | Level 65 | Level 66 | ||||
Sand Rush |  Sap Sipper | Serene Grace |  Earth Eater |  Volt Absorb | Overgrow |
|||||
| Attacks: Accelerock Drill Run Stone Edge Stealth Rock | Attacks: Dragon Pulse Muddy Water Ice Beam Sludge Bomb | Attacks: Hyper Drill Drill Run Dragon Rush Coil | Attacks: Iron Tail Body Press Earthquake Rock Blast | Attacks: Double Shock Close Combat Ice Punch Quick Attack | Attacks: Flower Trick Thunder Punch Shadow Claw Play Rough |
|||||
| Hold Item: No Item | Hold Item: No Item | Hold Item: No Item | Hold Item: No Item | Hold Item: No Item | Hold Item: No Item | |||||
Tera Type Grass | ||||||||||
| Sprigatito Chosen Multi-Battle Partner |
| | | | |  |
|||||
| Champion Nemona | Lycanroc | Goodra | Dudunsparce | Orthworm | Pawmot | Quaquaval | ||||
| Battle Type Single Battle Items | Level 65 | Level 65 | Level 65 | Level 65 | Level 65 | Level 66 | ||||
Sand Rush | Sap Sipper | Serene Grace | Earth Eater | Volt Absorb | Torrent |
|||||
| Attacks: Accelerock Drill Run Stone Edge Stealth Rock | Attacks: Dragon Pulse Muddy Water Ice Beam Sludge Bomb | Attacks: Hyper Drill Drill Run Dragon Rush Coil | Attacks: Iron Tail Body Press Earthquake Rock Blast | Attacks: Double Shock Close Combat Ice Punch Quick Attack | Attacks: Aqua Step Brick Break Aerial Ace Ice Spinner |
|||||
| Hold Item: No Item | Hold Item: No Item | Hold Item: No Item | Hold Item: No Item | Hold Item: No Item | Hold Item: No Item | |||||
Tera Type Water | ||||||||||
| Fuecoco Chosen Multi-Battle Partner |
| | | | |  |
|||||
| Champion Nemona | Lycanroc | Goodra | Dudunsparce | Orthworm | Pawmot | Skeledirge | ||||
| Battle Type Single Battle Items | Level 65 | Level 65 | Level 65 | Level 65 | Level 65 | Level 66 | ||||
Sand Rush | Sap Sipper | Serene Grace | Earth Eater | Volt Absorb |  Blaze |
|||||
| Attacks: Accelerock Drill Run Stone Edge Stealth Rock | Attacks: Dragon Pulse Muddy Water Ice Beam Sludge Bomb | Attacks: Hyper Drill Drill Run Dragon Rush Coil | Attacks: Iron Tail Body Press Earthquake Rock Blast | Attacks: Double Shock Close Combat Ice Punch Quick Attack | Attacks: Torch Song Earth Power Shadow Ball Snarl |
|||||
| Hold Item: No Item | Hold Item: No Item | Hold Item: No Item | Hold Item: No Item | Hold Item: No Item | Hold Item: No Item | |||||
Tera Type Fire | ||||||||||
| Quaxly Chosen Multi-Battle Partner |
| Picture | Item | Method | Quantity |
 |
Naughty Mint | In grass by river | |
 |
Fresh Water | In water basin | |
 |
TM142 | In water basin | |
 |
Elixir | In rock on path down | |
 |
Hyper Potion | By rock on path down | 2 |
 |
Rare Bone | By cliffside on path down | |
 |
Nugget | Next to rock on first research station | |
 |
Full Restore | By tree west of research station | |
|
Hyper Potion | By tree on path between two stations | |
 |
Max Potion | By cliffface on path | |
 |
Max Ether | By rock on path down | |
 |
Sassy Mint | Along wall | |
 |
Revive | By rock on path down | |
 |
Scarlet Book | From Arven in the second Research Station | |
 |
Violet Book | From Arven in the second Research Station | |
|
Elixir | By rock on path between second and third station | |
 |
PP Up | By wall on path between second and third station | |
 |
TM027 | By waterfall | |
 |
Mild Mint | By rock at bottom of area | |
|
Elixir | By tree at bottom of area | 2 |
 |
Heal Ball | By wall at bottom of area | |
 |
Careful Mint | By wall at bottom of area | |
 |
Lemonade | Behind research station 3 | |
 |
Normal Tera Shard | By crystal tree near station 3 | |
 |
Protein | In cave behind station 3 | |
 |
Ice Tera Shard | In cave on way to station 4 | |
 |
TM171 | In middle platform in the cave on way to station 4 | |
 |
Electric Tera Shard | By crystal on path down from Station 4 | |
 |
Steel Tera Shard | By crystal on path down from Station 4 | |
 |
Poison Tera Shard | By crystal on path down from Station 4 | |
 |
Dark Tera Shard | By crystal on path down from Station 4 | |
 |
Fighting Tera Shard | By crystal on path down from Station 4 | |
 |
TM114 | By wall on path down from Station 4 | |
 |
Ghost Tera Shard | In water by Zero Lab | |
 |
Soda Pop | In crystal behind Zero Lab | |
|
Heal Ball | In cave behind Zero Lab | |
 |
Exp. Candy M | Behind the Zero Lab | |
 |
Exp. Candy L | Behind the Zero Lab | |
 |
Water Tera Shard | In cave with Crystal by the lab | |
|
TM171 | In cave with Crystal by the lab | |
 |
Psychic Tera Shard | By giant crystal at bottom of cave | |
 |
Comet Shard | On rock behind waterfall | |
 |
TM169 | Climb up the sides of the crater, near the top | |
 |
TM097 | In front of a Radar near the top | |
 |
Jolly Mint | Between two rocks on one of the highest clifffaces in the outside crater | |
|
Fresh Water | In water behind radar on one of the highest cliff areas in outside | 3 |
|
Exp. Candy M | Next to rock by radar on one of the highest cliff areas in outside | |
 |
Calm Mint | Alongside ravine in bottom of outside | |
|
Max Potion | Underneat ramp up from bottom of outside area | 1 |
 |
Zinc | Underneath ramp up from bottom of outside area | |
 |
Guard Spec. | On ramp down to the bottom in the outside | |
 |
Timer Ball | On cliffside towards bottom | |
 |
Water Stone | Between rocks in a river at the bottom | |
 |
Iron | By large rocks towards the bottom of the outside area | |
 |
Rock Tera Shard | On rock by giant crystals in the inside - Requires climbing on Koraidon | |
|
Max Potion | By stations when you first drop down | |
 |
TM170 | By rock up waterfall in hidden cave off of Research Station 3 | |
 |
Timid Mint | In hidden cave off of Research Station 3 | |
 |
TM138 | In hidden cave off of Research Station 3 | |
 |
TM159 | Across gap to west of entrance, between rocks | |
 |
Ganlon Berry | Hidden in ground | |
 |
Liechi Berry | Hidden in ground | |
 |
Salac Berry | Hidden in ground | |
 |
Petaya Berry | Hidden in ground | |
 |
Apicot Berry | Hidden in ground | |
 |
Dusk Stone | Hidden in ground | |
 |
Shiny Stone | Hidden in ground | |
 |
Dawn Stone | Hidden in ground | |
 |
Oval Stone | Hidden in ground | |
 |
Bright Powder | Hidden in ground | |
 |
TM165 | By tree in rocky area above cliff near Research Station 1 | |
|
Full Restore | On cliff edge around Station 1 | |
 |
Serious Mint | Inamongst rocks alongside wall in the higher area | |
 |
TM079 | By crystallised tree in the higher area | |
 |
X Attack | By rock in higher area | 2 |
 |
TM158 | By tree in higher area | |
 |
Quick Ball | Along wall in higher area | |
|
Exp. Candy M | In higher area by waterfall | 2 |
 |
TM111 | By top of waterfall next to a rock | |
|
Soda Pop | By top of waterfall next to a rock | 3 |
|
Max Potion | By top of waterfall next to a rock | |
 |
Lax Mint | On cliff edge in higher area | |
|
Exp. Candy L | By radar dish east of entrance | |
|
Max Potion | By cliffface wall on second level down on a cliff | |
 |
TM152 | By cliffface wall on second level down on a cliff | |
|
Max Ether | By rock part way down the cliff | |
 |
Ether | On cliff edge on second level down | |
|
Revive | By rock part way down the cliff | |
 |
TM163 | On giant stone pillar midway down | |
 |
Max Elixir | On giant stone pillar midway down | |
 |
Hasty Mint | On cliff edge on hill midway down | |
|
Revive | By tree on cliffside midway down | |
 |
TM100 | By lone tree in bit off to side midway down | |
 |
Burn Heal | On rocky branch out from cliff midway down | |
 |
Lonely Mint | On cliffside midway down | |
 |
Antidote | By rock near waterfall midway down, on cliff edge | |
 |
TM133 | By rock near waterfall midway down, on cliff edge | |
 |
Quiet Mint | Behind Research Station 2 | |
 |
TM038 | Alongside backwall around corner from Station 2 | |
 |
Awakening | Alongside cliff wall in south west | 3 |
 |
TM078 | Along cliffwall on path up from Research Station 2 | |
|
Max Potion | By rocks down from Research Station 1 | |
 |
Naive Mint | By tree atop rock down from Research Station 1 | |
|
Ice Tera Shard | By tree next to Research Station 1 | 3 |
 |
Modest Mint | Next to tree down cliff next to Research Station 1 | |
 |
TM062 | On cliff down from Station 1, up on a higher platform on a cliff edge | |
 |
Rare Candy | On cliff down from Station 1, up on a higher platform on a cliff edge | |
 |
X Defense | On cliff down from Station 1, up on a higher platform on a cliff edge | 2 |
 |
TM137 | By rock down from Station 1, up on a higher platform on a cliff edge | |
 |
Gentle Mint | By tree next to waterfall on platform raised from Station 1 | |
 |
TM140 | On cliff directly above Research Station 2 | |
 |
Sun Stone | On cliff edge on horizontal platform on path down to Station 3 | |
 |
Paralyze Heal | Up cliff going down from Station 2 | 3 |
|
Exp. Candy M | Up cliff going down from Station 2 | |
 |
TM143 | On cliff by rocks on path to Station 3 | |
|
Hyper Potion | By rock on cliff in area above Station 3 | 2 |
 |
Brave Mint | By rock on cliff in area above Station 3 | |
|
Exp. Candy M | By cliff when you go right from Station 3 | |
|
Quick Ball | By cliff edge of middle gap to right of Station3 | 2 |
 |
Bug Tera Shard | By tree in path counterclockwise from Station 3 | 3 |
 |
Impish Mint | By rock underneath ramp up from bottom | |
 |
Flying Tera Shard | By tree near cliffface edge on bottom area | 3 |
|
Rare Candy | By cave entrance in some rocks | |
 |
TM156 | By rock on cliff on external wall of cave | |
 |
TM093 | On top of gems on bottom floor | |
 |
Ground Tera Shard | On top of gems on bottom floor | 3 |
 |
Dragon Tera Shard | On top of gems on bottom floor | 3 |
 |
TM161 | On top of research lab | |
|
TM171 | On top of main Zero Lab | |
 |
TM101 | On top of Station 4 | |
 |
Max Revive | On top of Station 4 | |
 |
TM150 | On platform in middle of cave, next to rock | |
 |
Fire Stone | On platform path down when going clockwise, next to a rock |
| Fixed Spawns | |||||
 |  |  |  | ||
| Gible | Carbink | Glimmet | Glimmora | ||
| | |  | | ||
| Level 63 - 64 | Level 65 - 69 | Level 63 - 67 | Level 68 - 75 | ||
Trainers
Scarlet / Violet
 |
|||||
| Pokémon Trainer Kieran | Terapagos | ||||
| Battle Type Single Battle Items | Level 85 | ||||
Tera Shift |
|||||
| Attacks: Zen Headbutt Earth Power Water Pulse |
|||||
| Hold Item: No Item | |||||
 |
|||||
| Pokémon Trainer Carmine | Sinistcha | ||||
| Battle Type Single Battle Items | Level 75 | ||||
| Hospitality |
|||||
| Attacks: Matcha Gotcha Life Dew Shadow Ball Rage Powder |
|||||
| Hold Item: No Item | |||||
Tera Type Grass | |||||
| Multi-Battle Partner |
 |  |  |  |  |
|||||
| Pokémon Trainer Kieran | Hydrapple | Incineroar | Porygon-Z | Grimmsnarl | Dragonite | ||||
| Battle Type Single Battle Items | Level 82 | Level 81 | Level 81 | Level 81 | Level 80 | ||||
| Supersweet Syrup | Intimidate | Adaptability | Prankster |  Multiscale |
|||||
| Attacks: Syrup Bomb Fickle Beam Body Press Dragon Cheer | Attacks: Darkest Lariat Brick Break Flare Blitz Fake Out | Attacks: Hyper Beam Ice Beam Thunderbolt Shadow Ball | Attacks: Sucker Punch Spirit Break Light Screen Reflect | Attacks: Hurricane Thunder Extreme Speed Breaking Swipe |
|||||
| Hold Item: No Item | Hold Item: No Item | Hold Item: No Item | Hold Item: No Item | Hold Item: No Item | |||||
Tera Type Fighting | Tera Type Fire | Tera Type Normal | Tera Type Fairy | Tera Type Normal | |||||
| Multi-Battle Partner |
| Picture | Item | Method | Quantity |
 |
Stellar Tera Shard | Next to cliff on way down | 11 |
|
TM142 | On cliffside | |
|
Full Restore | On rock near Tera Bundle | 2 |
|
Ice Tera Shard | On Crystal near Stellar Tera Noivern | 14 |
|
TM165 | On Crystal near Stellar Tera Noivern | |
|
Flying Tera Shard | On cliff by Noivern | 21 |
|
TM143 | On cliff to east of third crystal bundle | |
|
Max Revive | On pillars in western area from third crystal bundle | |
|
Ground Tera Shard | On pillars in western area from third crystal bundle | 16 |
|
Psychic Tera Shard | On pillars in western area from third crystal bundle | 23 |
 |
TM141 | Up cliff southwest of Stellar Tera Sandy Shocks | |
 |
Grass Tera Shard | On crystal pillar southeast of Stellar Tera Sandy Shocks | 20 |
|
TM156 | On crystal pillar southeast of Stellar Tera Sandy Shocks | |
|
Max Potion | On rock down from third tera bundle | |
|
Full Restore | Alongside cliff on way down from third tera bundle | 3 |
|
Max Elixir | Alongside cliff on way down from third tera bundle | 3 |
 |
Full Heal | Alongside cliff on way down from third tera bundle | 5 |
|
Max Revive | Alongside cliff on way down from third tera bundle | 2 |
|
Max Potion | Alongside cliff on way down from third tera bundle | 2 |
|
TM159 | In alcove in path down | |
 |
Fire Tera Shard | On top of crystal over crevice | 24 |
|
TM150 | On Crystal pillar in alcove in hidden cave half way down circular room | |
|
Flying Tera Shard | Inside cave behind crystal unlocked by defeating Stella Tera Type Garchomp | 19 |
|
Psychic Tera Shard | Inside cave behind crystal unlocked by defeating Stella Tera Type Garchomp | 17 |
|
Bug Tera Shard | Inside cave behind crystal unlocked by defeating Stella Tera Type Garchomp | 24 |
|
Rock Tera Shard | Inside cave behind crystal unlocked by defeating Stella Tera Type Garchomp | 17 |
|
Ghost Tera Shard | Inside cave behind crystal unlocked by defeating Stella Tera Type Garchomp | 17 |
|
Dark Tera Shard | Inside cave behind crystal unlocked by defeating Stella Tera Type Garchomp | 24 |
|
Steel Tera Shard | Inside cave behind crystal unlocked by defeating Stella Tera Type Garchomp | 17 |
|
Dragon Tera Shard | Inside cave behind crystal unlocked by defeating Stella Tera Type Garchomp | 19 |
|
TM171 | Inside cave behind crystal unlocked by defeating Stella Tera Type Garchomp | 1 |
 |
Fairy Tera Shard | Inside cave behind crystal unlocked by defeating Stella Tera Type Garchomp | 22 |
|
Poison Tera Shard | Inside cave behind crystal unlocked by defeating Stella Tera Type Garchomp | 26 |
|
Ice Tera Shard | Inside cave behind crystal unlocked by defeating Stella Tera Type Garchomp | 28 |
|
Dragon Tera Shard | Inside cave behind crystal unlocked by defeating Stella Tera Type Garchomp | 26 |
|
Steel Tera Shard | Inside cave behind crystal unlocked by defeating Stella Tera Type Garchomp | 31 |
|
Normal Tera Shard | Inside cave behind crystal unlocked by defeating Stella Tera Type Garchomp | 25 |
|
Fire Tera Shard | Inside cave behind crystal unlocked by defeating Stella Tera Type Garchomp | 22 |
|
Water Tera Shard | Inside cave behind crystal unlocked by defeating Stella Tera Type Garchomp | 18 |
|
Electric Tera Shard | Inside cave behind crystal unlocked by defeating Stella Tera Type Garchomp | 29 |
|
Grass Tera Shard | Inside cave behind crystal unlocked by defeating Stella Tera Type Garchomp | 17 |
 |
Premier Ball | Inside cave behind crystal unlocked by defeating Stella Tera Type Garchomp | 1 |
|
Fighting Tera Shard | Inside cave behind crystal unlocked by defeating Stella Tera Type Garchomp | 26 |
 |
TM220 | Inside cave behind crystal unlocked by defeating Stella Tera Type Garchomp | |
|
Ground Tera Shard | Inside cave behind crystal unlocked by defeating Stella Tera Type Garchomp | 23 |